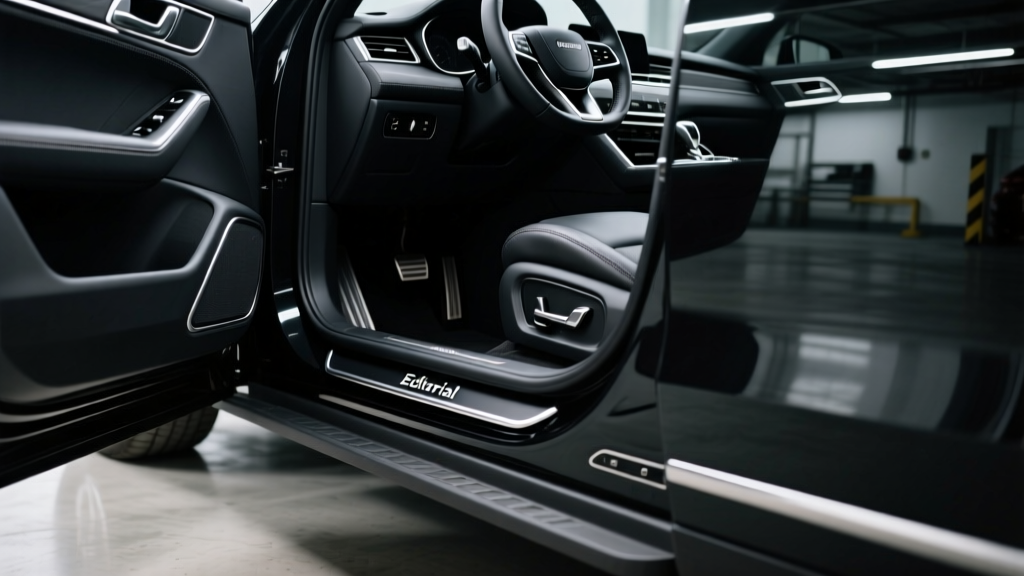
Door Sill Plate Installation: Custom Techniques (2026)
Door sill plates (also called scuff plates or entry guards) are one of those interior upgrades that you notice every single time you get in the car. They protect high-wear paint and trim, clean up the look of the thresholds, and?when customized well?add a ?factory-plus? finish that makes the whole cabin feel more intentional.
What makes sill plates especially appealing is the range of customization: brushed metal to match trim, carbon-look accents, LED illumination tied into your interior lighting, or even body-color painted plates that disappear until the light hits them. The flip side is that installation is where most people run into problems: uneven alignment, poor adhesive prep, moisture intrusion, or wiring that becomes a rattle later.
This guide walks through advanced techniques for installing and customizing door sill plates with a professional result. You?ll learn how to choose the right materials, prep surfaces like a detailer, get laser-straight alignment, and safely integrate lighting?plus the common mistakes that ruin fitment and longevity.
What Door Sill Plates Actually Do (Beyond Looking Good)
- Protect paint and plastics from shoe scuffs, grit, and winter salt.
- Reduce resale ?wear signals? by keeping thresholds cleaner and less scratched.
- Hide existing damage on older vehicles without repainting the jamb.
- Add traction (for textured or rubberized styles) on taller vehicles where you pivot your foot.
- Improve perceived quality with OEM-style metal finishes or subtle illumination.
Choosing the Right Sill Plate Type for Your Build
Material Options: Pros and Cons
- Stainless steel: Durable, scratch-resistant, easy to clean; can look ?aftermarket? if the finish doesn?t match other trim.
- Brushed aluminum: Lightweight and premium-looking; can dent if thin, and some finishes show scuffs faster than steel.
- ABS/plastic (painted or textured): Often closest to OEM styling; less premium feel, but excellent for color-matching.
- Carbon fiber (real or overlay): Sporty and eye-catching; real carbon costs more, overlays vary widely in quality.
- Rubberized or stepped ?protector? styles: Great for SUVs/trucks; can trap dirt at edges if not sealed well.
Mounting Styles: Adhesive vs Clip-In vs Hybrid
- 3M tape (most common): Fast and clean; requires perfect surface prep and temperature control.
- Clip-in/OEM replacement: Best long-term security; fitment must be exact to avoid squeaks.
- Hybrid (clips + tape): Strong and rattle-resistant; careful alignment is mandatory because it ?locks in? quickly.
Illuminated Sill Plates: OEM-Like vs Universal
If you want LED sill plates, aim for a kit that includes:
- Automotive-grade wiring with abrasion protection
- An inline fuse (or fuse-tap solution)
- A control method (door trigger, courtesy light circuit, or a dedicated module)
- Weather-resistant connections
Tools and Supplies for a Professional Install
You don?t need a full workshop, but the right supplies separate a ?stuck on? plate from a long-lasting, factory-like result.
Core Tools
- Trim removal tools (nylon pry tools)
- Microfiber towels (lint-free)
- Isopropyl alcohol (70?90%) or dedicated panel wipe
- Masking tape (blue painter?s tape works well)
- Heat source (hair dryer or heat gun on low)
- Measuring tape or ruler
- Marker or wax pencil (optional for alignment marks)
Advanced Materials (Worth It for Longevity)
- 3M Adhesion Promoter 94 (use sparingly, only on the bonding area)
- Automotive VHB tape (if replacing low-quality pre-applied tape)
- Edge sealant (clear automotive-grade sealant for harsh climates)
- Split loom + cloth harness tape (for wiring that won?t rattle)
- Rust inhibitor or touch-up paint (if you uncover chips or bare metal)
Step-by-Step: Advanced Adhesive Sill Plate Installation
1) Dry Fit and Plan the Alignment
- Vacuum and wipe the threshold area so debris doesn?t skew your test fit.
- Place the sill plate without removing tape backing and check:
- Door clearance (no rubbing)
- How it sits against curves and step contours
- Whether it covers factory seam lines evenly
- Use masking tape as alignment guides: run a straight tape line along the outer edge where the plate should sit. This becomes your ?rail? during final placement.
Real-world example: On many sedans, the outer painted lip is slightly curved. If you align only to the inner plastic trim, the plate can look crooked when viewed from outside the car. Use the outer edge as your visual reference for a straighter look.
2) Surface Prep Like a Detailer
- Clean with mild soap and water if the area is dusty or oily, then dry completely.
- Degrease with isopropyl alcohol/panel wipe using a clean microfiber. Do two passes:
- First pass lifts grime
- Second pass ensures no residue remains
- Inspect for wax, dressing, or silicone (common on door jambs). If you?ve used interior shine products near the threshold, spend extra time degreasing.
3) Fix the ?Hidden Problems? Before You Cover Them
- If you see paint chips or bare metal, apply touch-up paint or rust inhibitor and let it cure fully.
- If the plastic threshold trim is loose or creaking, address clips first. Installing over a moving panel leads to tape failure.
4) Upgrade the Tape (If Needed)
Many off-brand sill plates ship with thin adhesive that fails in heat, cold, or moisture. If the included tape looks narrow, uneven, or gummy, replace it with quality VHB tape.
- Peel off the old tape completely.
- Clean the underside with alcohol.
- Apply new tape in continuous strips, focusing on:
- Edges (to prevent lifting)
- Any raised contours that need support
5) Use Adhesion Promoter Strategically
Adhesion promoter improves bond strength but should be used carefully.
- Apply promoter only where the tape will sit (not beyond the plate outline).
- Let it flash off per the product instructions (usually a minute or two).
- Avoid touching the prepped area with your fingers afterward.
6) Temperature Control for Maximum Bond
- Ideal install temperature: 65?85�F (18?29�C).
- If it?s cold, gently warm:
- The door sill surface
- The adhesive on the plate
- Do not overheat?warm to the touch, not hot.
7) Final Placement: The Hinge Method
This is the trick installers use to avoid the dreaded ?I set it down wrong and now it?s stuck? moment.
- With the plate aligned, add a strip of masking tape along one edge to create a ?hinge.?
- Flip the plate up on the hinge, then peel a small section of the tape backing (1?2 inches) and fold the backing outward for easy pull.
- Flip the plate back down, confirm alignment, then press the exposed section to tack it in place.
- Slowly pull the remaining backing while applying pressure from the center outward.
8) Apply Proper Pressure and Cure Time
- Press firmly along all edges for 30?60 seconds.
- For best results, avoid washing the car or soaking the jamb area for 24?48 hours.
- If the plate has edges that want to lift, use painter?s tape to hold them down during curing.
Advanced Customization: Lighting, Finishes, and OEM-Style Integration
Adding LED Illumination Without Making a Wiring Mess
Illuminated door sill plates look great when the wiring is invisible and silent (no rattles). Here?s the clean approach.
- Decide how you want them to behave:
- Door-triggered: Turns on with the courtesy lights (most OEM-like).
- Parking/headlights: Always on at night (can be distracting for some).
- Manual switch: Simple and predictable.
- Choose a safe power source:
- Courtesy light circuit (recommended for door-trigger behavior)
- Fuse tap at the interior fuse box (clean and serviceable)
- Route wiring like OEM:
- Follow factory harness paths under kick panels
- Use cloth harness tape to prevent buzz/rattle
- Protect wire with split loom where it may rub
- Crossing door openings: Avoid routing wire where feet can snag it. If you must pass between body and door, use factory grommet areas only?never pinch a wire in a hinge path.
Practical tip: After routing, do a ?rattle test.? Tap trim panels and gently tug the harness. If you hear clicking or movement, add tape or a clip until everything is snug.
Custom Finishes That Look Factory, Not Flashy
- Brushed direction matching: If your interior has brushed trim, match the grain direction across all four doors for a cohesive look.
- Blackout approach: Satin black sill plates hide scuffs and blend with darker interiors better than mirror finishes.
- Color matching: Painted ABS plates can be matched to body color, but a subtle contrast (like dark graphite) often looks more premium and hides wear.
- Laser-etched logos: Cleaner than printed logos and more resistant to fading.
Edge Sealing for Harsh Climates
If you deal with road salt, heavy rain, or frequent car washes, consider a thin edge seal. This reduces water intrusion under the plate and helps prevent tape lift at corners.
- Use a clear, flexible automotive sealant.
- Apply minimally?excess attracts dirt and looks messy.
- Focus on leading edges that catch shoe contact.
Product Recommendations and Comparisons
Best for Most Owners: OEM-Style Clip-In or Model-Specific Kits
- Why: Best fitment, cleanest edges, least ?universal? look.
- Look for: Vehicle-specific part numbers, strong reviews mentioning exact model/year, and photos of installed results.
Best Adhesive Upgrade: 3M VHB + 3M Adhesion Promoter 94
- Why: Consistent bonding across temperature swings; excellent for metal-to-painted surfaces and plastics when properly prepped.
- Ideal for: Aftermarket stainless/aluminum plates that need better tape than what?s included.
Best Illuminated Approach: Kits With Fuse Tap + Control Module
- Why: Cleaner power integration and fewer electrical surprises than bare-wire LED plates.
- Look for: Inline fuse, clear wiring diagram, and waterproof connectors.
Common Mistakes to Avoid
- Skipping the dry fit: Many thresholds aren?t perfectly symmetrical; what fits the front door may not align the same in the rear.
- Installing on a cold day without warming surfaces: Tape can bond weakly and lift at corners within days.
- Cleaning with the wrong product: Household glass cleaner or interior shine products can leave residues that ruin adhesion.
- Touching the adhesive with your fingers: Skin oils reduce bond strength, especially at edges.
- Misrouting LED wiring: Loose wires can rattle, chafe, or snag?worse, they can short if unprotected.
- Rushing cure time: High-pressure water or aggressive scrubbing in the jamb area too soon is a common reason plates peel.
FAQ: Door Sill Plate Installation and Customization
How long do adhesive door sill plates typically last?
With proper prep, quality VHB tape, and decent temperature conditions, adhesive sill plates can last for years. Failures usually come from contamination (silicone, wax), cold installs, or poor tape quality.
Can I install sill plates over existing scratches or chipped paint?
You can, but address bare metal first. Touch up chips or apply a rust inhibitor and let it cure. Covering exposed metal traps moisture and can accelerate corrosion.
Will illuminated sill plates drain my battery?
If wired into the courtesy light circuit or a proper controller, current draw is typically low and timed (they turn off with the interior lights). Problems happen when they?re wired to constant power without a shutoff.
What?s the best way to remove an old sill plate without damaging paint?
Warm it gently, then use dental floss or fishing line to ?saw? through the tape. Remove residue with an automotive adhesive remover, then clean with alcohol before installing the new plate.
Do I need to remove interior trim panels to install LED sill plates?
Often, yes?at least the kick panel and sometimes lower door trim pieces. It?s the best way to route wiring safely and avoid pinching or rattles.
Are universal sill plates worth it?
They can be, especially for older vehicles with limited model-specific options. Choose a size that matches your threshold shape, upgrade the tape, and take extra time aligning so they don?t look ?stuck on.?
Next Steps: Get a Cleaner, Longer-Lasting Result
If you want your door sill plates to look OEM and stay put, focus on three things: alignment planning, surface prep, and temperature-controlled bonding. If you?re adding illumination, route wiring like the factory would?protected, secured, and out of the way of feet and hinges.
Your action plan:
- Pick a sill plate style that matches your interior theme (finish, texture, logo, and lighting behavior).
- Dry fit and create masking tape alignment guides before exposing adhesive.
- Prep the surface thoroughly, and upgrade to quality VHB tape if needed.
- Press, tape-hold any lifting edges, and respect cure time before washing.
- If wiring LEDs, use a fused source and secure the harness to prevent rattles.
Want more interior upgrade walkthroughs, fitment tips, and product-focused guides? Explore the latest how-tos on carinteriormix.com.